Inside the Blog
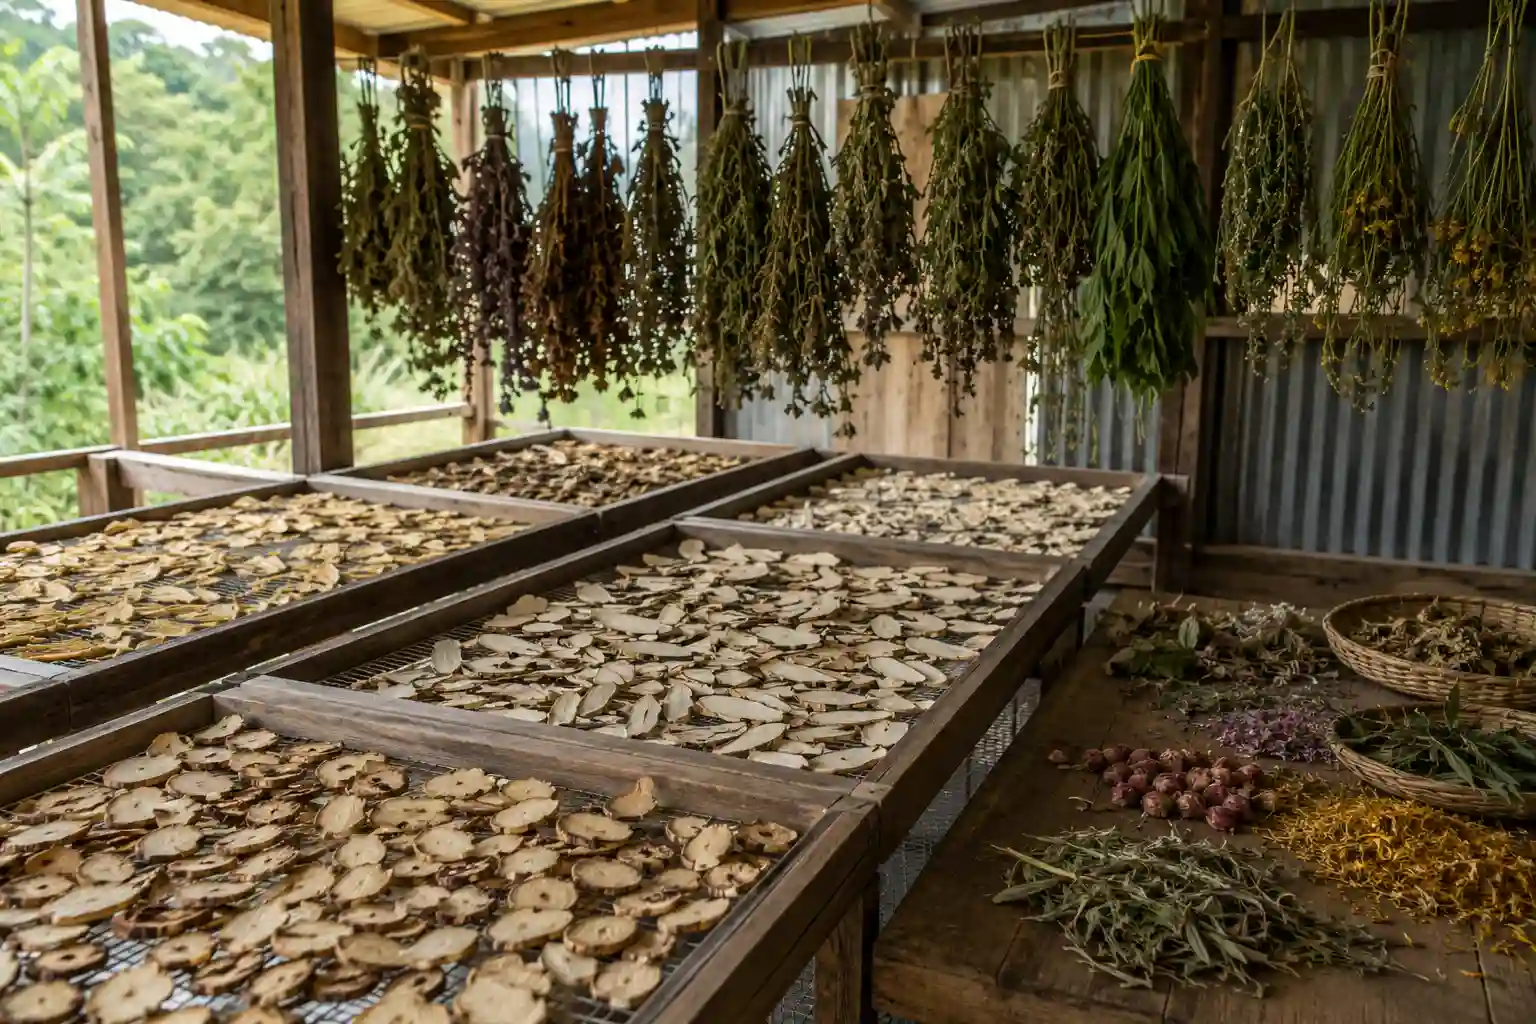
Drying plant roots, branches, leaves, flowers, and whole plants requires controlled moisture removal, good airflow, and the right drying method for each plant part. Thick roots need more preparation because they can remain wet inside even when the outside feels dry.
To dry roots safely, clean and trim them first, slice thick roots into smaller pieces, and spread them in a single layer with good airflow. Small whole plants can be hung upside down, while large or dense plants usually dry better when divided into branches.
The best drying conditions are low humidity, indirect light, moderate warmth, and steady air movement. This guide explains how to dry roots, how to dry a whole plant, how long different plant parts take to dry, and how to tell when dried roots and other plant materials are ready for storage.
Why Plant Materials Are Dried
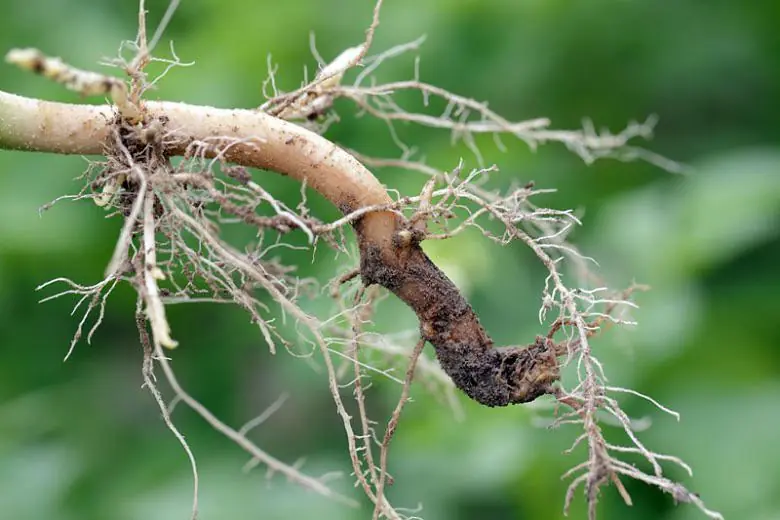
Drying removes moisture from plant material so it can be stored for longer without the same level of moisture-related deterioration.
Fresh roots, leaves, stems, flowers, and whole plants contain water that can encourage microbial activity, fungal growth, and decay. Proper drying reduces this moisture and helps the material remain stable during storage.
The drying method depends on the plant part. Roots and thick stems take longer to dry because they contain more dense tissue, while leaves and flowers usually dry faster. Whole plants can also take longer when dense foliage or thick central stems restrict airflow.
Proper drying preserves structure, color, aroma, flavor, and usable plant compounds. Poor drying causes mold, browning, loss of scent, brittle damage, or internal spoilage.
Different plant organs dry differently because they contain different amounts of water, fiber, resin, starch, mucilage, oil, and volatile compounds.
Roots, rhizomes, tubers, and barky stems dry slowly. Leaves and flowers dry quickly. Whole plants dry unevenly unless they are small, open, and well spaced.
Whole Plant Drying vs Branch Drying
Drying a whole plant means hanging or placing the harvested plant as one complete unit, with most of its roots, stems, leaves, and flowers still attached. For small plants with thin stems and open foliage, hanging the whole plant upside down can provide good airflow and help maintain its shape while it dries. Large plants, plants with thick roots, and plants with dense foliage are usually easier to dry after separating them into smaller branches or plant parts.
Branch drying means cutting the plant into smaller stems, shoots, or flowering branches before drying. The best method depends on plant size, stem thickness, humidity, and the final use of the material.
Benefits of Whole Plant Drying
Whole plant drying is useful for small plants with thin stems and open foliage. Evergreen woody plants such as boxwood are different because their stems and foliage are denser, so individual branches may be easier to dry than the entire plant.
It keeps the plant architecture intact. This is useful for seed heads, specimen preservation, dried bouquets, educational herbarium-style preparation, and bundled medicinal herbs.
Whole plant drying reduces handling damage. Delicate leaves, flowers, and seed structures stay attached better when the plant is handled as one unit.
Whole plant drying can also support a gentle curing process. Moisture moves slowly from inner tissues toward the surface before complete drying. The main risk is uneven drying. Thick central stems and dense foliage can retain moisture after outer leaves feel dry.
Benefits of Drying Individual Branches
Branch drying gives better airflow around each stem.
Smaller plant sections dry faster and more evenly than whole plants. This reduces fungal growth in humid environments. Branch drying is better for woody plants and herbs with thicker stems, flowering tops, leafy stems, and shrubs with dense growth. Understanding how woody plants grow and develop can also help when deciding which stems are practical to dry.
Cut branches are easier to hang, rotate, inspect, and remove when fully dry. Branch drying also makes sorting easier. Damaged leaves, diseased tissue, woody stems, and usable flowering tops can be separated before storage.
Which Method Is Better: Whole Plant or Individual Branches
There is no single drying method that works best for every plant. Small, thin-stemmed plants can often be dried whole, while large, dense, or moisture-rich plants are easier to dry after being divided into branches or smaller sections.
If the plant has thick roots, dense foliage, or a large central stem, separating the plant improves airflow and makes it easier to check for remaining moisture. If the plant is small and airy, hanging the whole plant upside down can work well.
A useful rule is to dry the plant in the smallest practical sections that allow good airflow without causing unnecessary damage to the leaves, flowers, roots, or stems.
How to Dry Plant Roots Properly
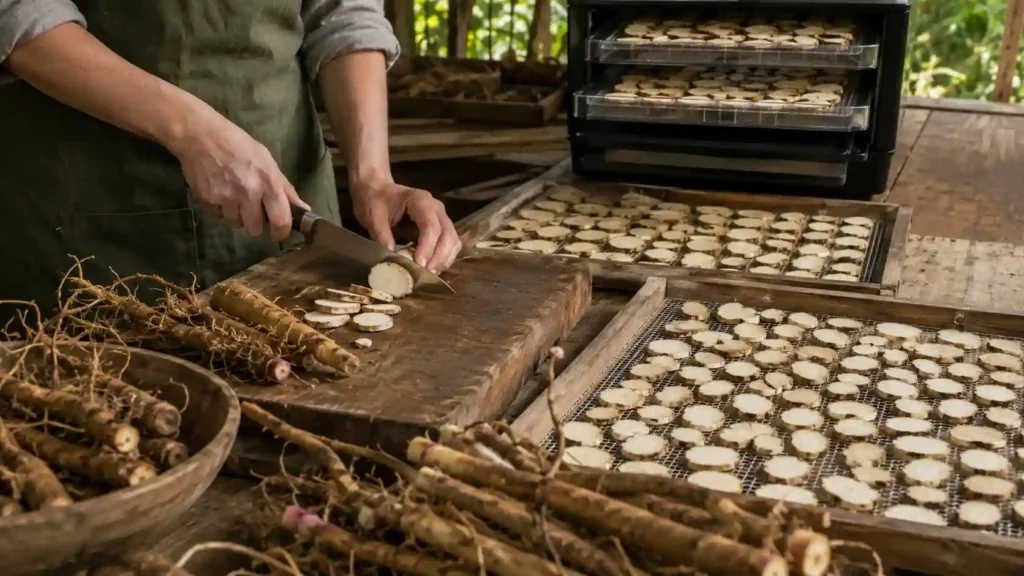
To dry plant roots properly, clean them, remove damaged tissue, cut thick roots into smaller pieces, and place them in a single layer where air can circulate freely. Thick roots should not be left whole because the outside can become dry while moisture remains trapped inside.
Dried roots should be hard, lightweight, and completely dry through the center. A root that feels cool, soft, flexible, or moist inside needs more drying time.
The same basic process works for many types of roots, including thick taproots, fibrous roots, and rhizomes, although drying time varies according to thickness, moisture content, humidity, and the drying method.
Cleaning Roots
Shake off loose soil immediately after harvest.
Rinse roots quickly under cool running water if soil is attached. Do not soak roots for long periods because soaking increases moisture absorption and may reduce quality.
Use a soft brush to remove soil from crevices. Trim away rotten, blackened, insect-damaged, or diseased tissue.
Split tangled root crowns when needed so air can reach the interior. Pat roots dry with clean towels before slicing or placing them on drying racks. Do not store washed roots in piles. Wet roots heat, sweat, and spoil quickly.
How to Prepare Roots Before Drying
Before drying roots, remove excess soil, damaged tissue, and unnecessary stems. Wash heavily soiled roots quickly under cool running water, then pat them completely dry before cutting.
Small, thin roots may be dried whole if air can reach all sides. Thick roots should be split or sliced because moisture can remain trapped in the center. Keep pieces as uniform in thickness as possible so they dry at a similar rate.
Do not place freshly washed roots in a pile or sealed container. The trapped moisture can slow drying and create conditions for mold and spoilage.
Slicing Thick Roots
Thick roots should usually be sliced or split before drying. Cutting a root into smaller, more uniform pieces allows moisture to escape from the center and makes the drying process more even.
Cut large taproots lengthwise or into cross-sections. Slice dense roots into pieces that allow moisture to escape from the center.
For most herbal roots, slices between 3 and 10 mm dry more reliably than large chunks. Very fibrous roots may be split lengthwise instead of cut into discs.
Rhizomes such as ginger-like or turmeric-like structures should be sliced across the grain or split lengthwise, depending on thickness. Uniform slicing is important. Uneven pieces dry at different speeds and increase the risk of hidden moisture.
Use a clean, sharp knife or root cutter. Bruised tissue oxidizes faster and may darken during drying. Avoid leaving very thick root pieces whole simply because the outside feels dry. Always check the center of a thick piece before storage.
Air Drying Techniques
Air drying roots works best with mesh racks, screens, or shallow trays that allow air to reach the root pieces from multiple directions. Spread root pieces in a single layer. Pieces should not overlap. Use mesh screens when possible. Mesh allows airflow from below and above.
Place roots in a warm, dry, shaded area with moving air. Turn root pieces daily during the first stage of drying. Thick roots should be inspected by breaking or cutting test pieces. A dry exterior does not prove a dry center. If the room is humid, drying roots can take considerably longer. Use a fan for gentle air movement or switch to a food dehydrator when the surrounding humidity remains high.
Roots are dry when they are hard, lightweight, and break or snap cleanly. Leathery or cool-feeling centers indicate remaining moisture.
Using a Food Dehydrator
A food dehydrator is the safest method for thick roots in damp climates. Set the dehydrator to low or moderate heat. Many roots dry well around 35°C to 50°C.
Use lower temperatures for aromatic roots that contain volatile compounds. Use moderate heat for dense, non-aromatic roots that retain moisture.
Arrange slices in a single layer on dehydrator trays. Do not overload trays. Crowding blocks airflow and slows dehydration. Check roots periodically. Rotate trays if the dehydrator dries unevenly.
Roots are finished when the center is fully dry, not merely when the surface feels dry.
How to Tell When Dried Roots Are Ready
Dried roots should be completely dry through the center, not just dry on the surface. The exact texture depends on the type of root, but there should be no soft, cool, wet, or flexible center remaining.
Check a few of the thickest pieces rather than judging the entire batch from the smallest pieces. Break or cut one open and inspect the center. If it still feels soft or moist, continue drying.
Fully dried roots are generally hard, lightweight, and firm throughout. Some thin roots may snap easily, while thicker roots can become very hard after complete dehydration.
Do not move roots into long-term storage while they still contain internal moisture. Residual moisture can lead to condensation, mold, and spoilage.
Best Conditions for Drying Plants
Good drying depends on four controls: temperature, humidity, airflow, and light exposure.
Drying is not just “leaving plants out.” It is controlled moisture removal.
Temperature
Most leaves and flowers dry best with gentle warmth, while roots and thick stems usually need more time because their dense tissue holds moisture longer.
High heat can drive off aromatic oils, damage volatile compounds, darken tissues, and reduce herbal quality.
A practical drying range for many herbal plants is 30°C to 40°C for delicate leaves and flowers.
Roots, bark, and thick stems can often tolerate 35°C to 50°C, especially when sliced.
Avoid high oven heat unless no other method is available. Ovens often run too hot and have poor airflow.
Humidity
Low humidity improves drying quality.
The ideal drying environment is dry enough to remove moisture steadily but not so harsh that leaves shatter before stems and roots finish drying.
Aim for relative humidity below 60%. Around 40% to 50% is better for most herbal drying.
In humid climates, use a dehydrator, fan-assisted drying room, dehumidifier, or smaller bundles.
High humidity slows dehydration and increases fungal growth.
Airflow
Airflow is essential.
Moving air carries moisture away from plant surfaces.
Still air allows moisture to collect around leaves, flowers, stems, and roots. This creates mold-friendly conditions.
Use open racks, mesh screens, hanging lines, breathable baskets, or small bundles.
A fan can help, but air should move gently. Strong airflow can strip delicate petals, scatter leaves, and overdry thin material.
Light Exposure
Shade drying is best for most medicinal herbs, leaves, and flowers.
Direct sunlight can bleach color, reduce aroma, and degrade sensitive plant constituents. The light requirements of a living plant are different from the light conditions used when drying harvested plant material. For example, many evergreen indoor plants need suitable light while growing, but harvested leaves and stems generally benefit from indirect light during drying.
Dry roots and branches in indirect light or shade unless the material is being dried only for craft use.
A dark, warm, ventilated room is often better than a sunny windowsill.
How Long Different Plant Parts Take to Dry
How long a plant takes to dry depends on the plant species, thickness of the material, starting moisture level, temperature, humidity, airflow, and drying method. There is no single number of days that applies to every plant.
Thin leaves and flowers can dry within a few days, while branches, whole plants, and thick roots may take one to several weeks when air dried. A food dehydrator can shorten the drying time, but the material should still be checked for complete dryness rather than removed after a fixed number of hours.
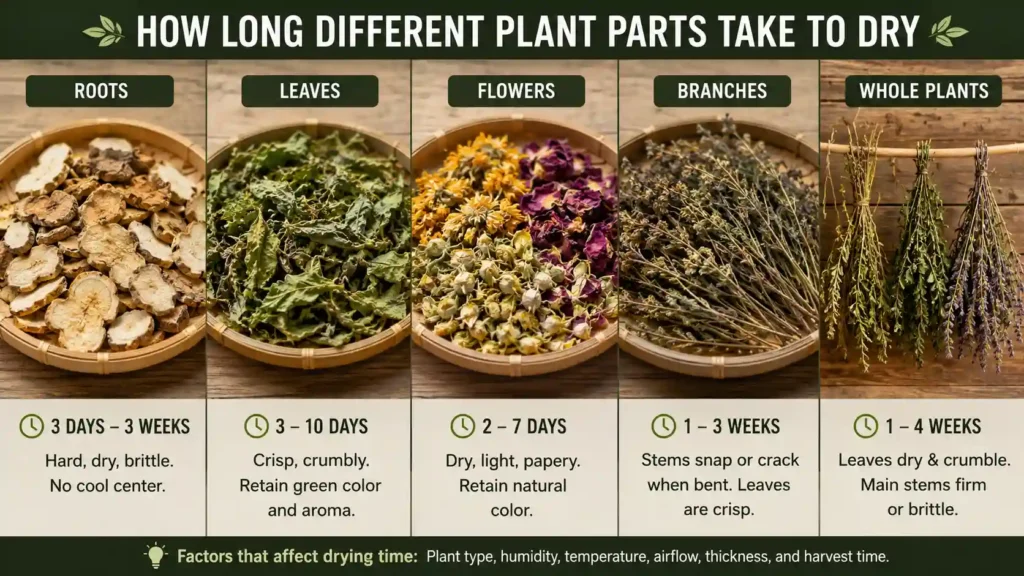
| Plant Part | Typical Drying Time | Best Method | Finished Texture | Main Risk |
|---|---|---|---|---|
| Roots | 3 days to 3 weeks | Sliced on racks or dehydrator trays | Hard and fully dry through the center; no soft or cool interior | Hidden internal moisture |
| Leaves | 3 to 10 days | Shade drying on screens or small hanging bundles | Crisp, crumbly, green if well dried | Browning and loss of aroma |
| Flowers | 2 to 7 days | Shaded racks, paper-lined trays, or loose bundles | Dry, light, papery | Color loss and petal mold |
| Branches | 1 to 3 weeks | Hanging in small spaced bundles | Stems snap or crack when bent | Mold inside dense foliage |
| Whole Plants | 1 to 4 weeks | Hanging upside down with wide spacing | Leaves feel dry and stems become firm or brittle | Uneven drying |
Thin stems should snap when dry. Leaves should crumble but not smell burnt or musty. Flowers should feel papery and retain as much natural color as possible. Roots should break cleanly or feel rock-hard throughout.
How Long Do Roots Take to Dry?
Thin roots may dry within several days, while thick roots can take one to three weeks when air dried. Slicing thick roots into smaller pieces can reduce drying time because moisture has a shorter distance to travel from the center to the surface.
A dehydrator can dry roots faster than room-temperature air drying, but the finished texture matters more than the exact drying time. Check the thickest pieces and make sure there is no moisture remaining inside before storage.
Common Drying Mistakes
Mold Formation
Mold forms when plant material stays damp for too long.
Common causes include large bundles, poor air circulation, high humidity, wet harvests, dirty roots, overlapping trays, and thick unsliced roots.
Mold may appear as white fuzz, gray patches, black specks, slimy areas, or a musty smell.
Discard moldy medicinal herbs. Do not store or consume dried plant material with visible fungal growth.
Overdrying
Overdrying happens when heat is too high or drying continues too long.
Leaves become powdery. Flowers lose color. Aromatic herbs lose scent. Roots may become excessively hard and difficult to cut.
Overdrying is especially damaging to plants rich in volatile compounds.
Use low heat, shade, and regular checks for delicate herbs.
Poor Air Circulation
Poor air circulation causes uneven dehydration.
Plant surfaces may look dry while inner stems, roots, or bundled leaves remain damp.
Avoid sealed rooms, closed boxes, plastic bags, and thick piles.
Good drying spaces allow air to enter, move through the material, and carry moisture away.
Drying Roots Without Cutting Them
Leaving thick roots whole is a common reason the outside becomes dry while the inside remains moist. This is especially likely with large taproots and dense root sections.
Thin roots can sometimes be dried whole, but thick roots should usually be split or sliced before drying. Check the center of the thickest pieces before storing them.
Direct Sunlight Damage
Direct sunlight can reduce preservation quality.
Sun exposure may bleach green leaves, fade flowers, weaken fragrance, and heat plant tissue unevenly.
Shade drying protects color, aroma, and many sensitive botanical qualities.
Sun drying may be acceptable for some durable roots or craft materials, but it is not the best method for high-quality medicinal herb preservation.
Best Storage Methods After Drying
Store dried plant material only after it is completely dry. For dried roots, check several of the thickest pieces before sealing the container. If the roots feel soft, flexible, cool, or damp inside, they need additional drying.
Use glass jars, metal tins, paper bags, cardboard boxes, or food-safe airtight containers depending on the plant part and climate.
Glass jars are useful because they reveal condensation. Condensation means the plant was not fully dry.
Keep dried herbs away from heat, light, moisture, insects, and strong odors.
Label every container with plant name, plant part, harvest date, drying method, and location if relevant.
Store roots separately from leaves and flowers. Roots are dense and may hold residual moisture longer.
Allow recently dried roots to condition before long storage. Conditioning means placing dried pieces in a container and checking daily for condensation, softness, or musty odor. If moisture appears, return the roots to drying racks or a dehydrator.
Do not pack dried plants tightly while they are still curing.
For best quality, keep dried leaves and flowers whole until use. Crushing increases surface area and speeds aroma loss.
FAQs
Can you dry a whole plant upside down?
Yes. Small, thin-stemmed plants can be dried upside down in loose bundles. Use shade, low humidity, and strong airflow. Large or dense plants dry more safely when divided into branches.
Is it better to dry roots whole or sliced?
Sliced roots dry more safely. Whole thick roots often trap moisture inside. Slice taproots, rhizomes, and medicinal roots to prevent mold and improve dehydration.
What temperature is best for drying medicinal herbs?
Most medicinal herbs dry best with low heat, often around 30°C to 40°C for leaves and flowers. Roots can usually tolerate slightly warmer drying if sliced properly.
How do you know when a root is completely dry?
A root is completely dry when it feels hard and dry throughout, with no soft, cool, flexible, or moist center. Check the thickest pieces rather than judging the entire batch by small pieces.
Can you dry plant roots without cutting them?
Thin roots can sometimes be dried whole, but thick roots are better split or sliced. Cutting thick roots allows moisture to escape from the center and reduces the chance of hidden moisture remaining after the outside feels dry.
How long does it take to dry plant roots?
Thin roots may dry within several days, while thick roots can take one to three weeks with air drying. Humidity, airflow, temperature, root thickness, and the drying method all affect the actual drying time.
Can you dry a whole plant with the roots attached?
Small plants with thin stems and roots can sometimes be dried as a whole plant, especially when hung upside down with good airflow. Large plants or plants with thick roots and dense foliage are usually easier to dry after separating the roots and branches.
Should plant roots be dried with or without soil?
Roots should be cleaned before drying. Remove loose soil and rinse heavily soiled roots quickly if necessary, then pat them dry before cutting or placing them on a drying rack.